Seven Tips for Playing Better Barre Chords

Updated August 2026

Learning barre chords can be challenging for beginner guitar players. Buzzing strings, muted notes and hand fatigue are common at first, but simply pressing harder is not always the answer. Small changes in finger position, wrist angle, thumb placement and guitar position can make a big difference.

These seven barre chord tips use the original photographs and exercises from this lesson to help you find a comfortable position where every note rings clearly. The goal is steady improvement, not forcing your hand into one exact position.

Before you practise: review the basic shapes on the free Guitar Chords Chart, including open chords, barre chords and power chords. For the full sequence of guitar lessons and resources, use the Guitar Learning Path.

Lesson by Brent C. Robitaille, music educator and founder of Kalymi Music.

Barre Chord Tip 1

Place the Barre Finger Close to the Fret

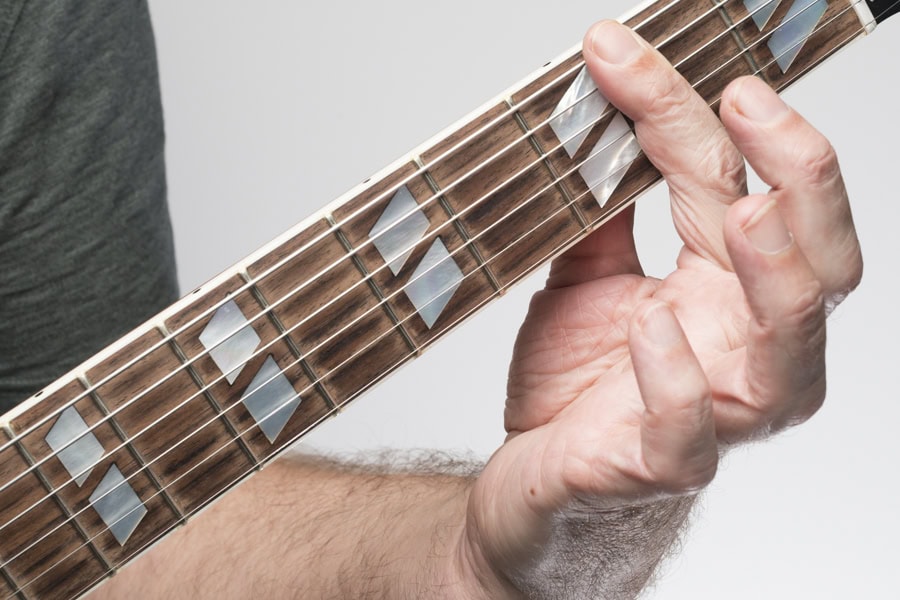
Tilt your index finger slightly to the left and place it very close to, or lightly touching, the fret. This position usually requires less pressure than placing the finger halfway between two frets.

Practise making the barre shown in Exercise 1 until all the notes ring clearly. Once you can produce a clean sound, move the same barre up and down the neck and listen for an even sound at each position.

Index finger positioned across the guitar strings close to the fret for a barre chord
Ex. 1: Keep the barre finger close to the fret and experiment with a slight tilt of the index finger.

Barre Chord Tip 2

Lower the Wrist and Keep the Finger in Line

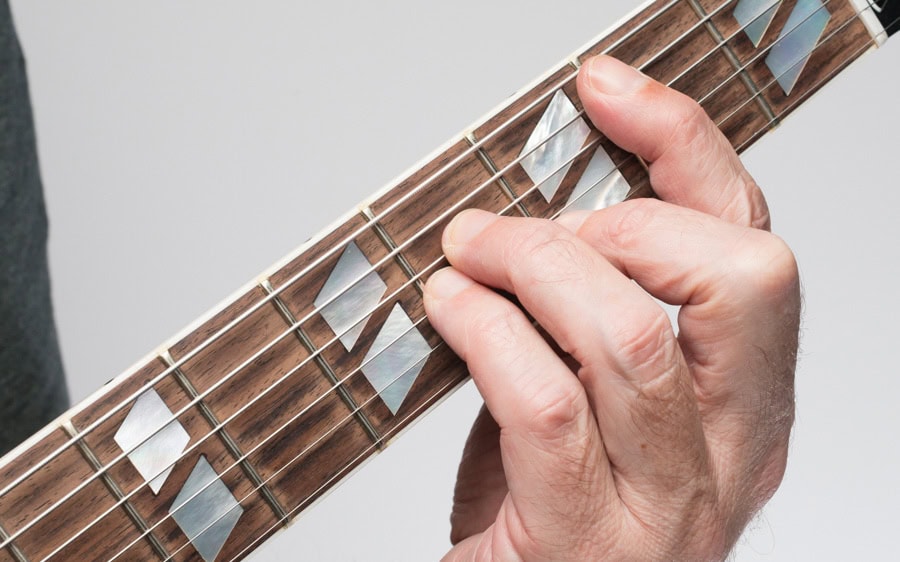
Lower your wrist slightly and keep the barre finger in line with the fret. Maintain even pressure across the strings rather than squeezing harder with one part of the finger.

Compare your hand position with Ex. 1 and Ex. 2. These are useful reference positions, but hand size and finger shape vary. Make small adjustments until the strings ring clearly and the hand feels comfortable.

Guitar barre chord hand position with the index finger aligned with the fret and wrist lowered
Ex. 2: Keep the index finger aligned with the fret while maintaining a comfortable wrist position.

Exercise 1: Build a Clean Barre

Make a barre across all six strings with your first finger. Play the first two measures with the barre alone. In measure 3, keep the barre in place and use finger 3 or 4 for the notes at the seventh fret.

Barre chord exercise in standard notation and guitar TAB using a fifth-fret barre and seventh-fret notes
Hold the fifth-fret barre as you add the notes at the seventh fret with the third or fourth finger.

Barre Chord Tip 3

Play Each String Separately and Listen for a Clear Note

Once you have the barre in position, play each string separately and slowly until you can hear every note clearly. If one string buzzes or sounds muted, stop and make a small adjustment to the index finger rather than immediately pressing harder.

Playing the strings one at a time makes it much easier to identify the problem. A full chord can hide a weak or muted note, while this simple test tells you exactly where the barre needs adjusting.

Exercise 2: Keep the Barre Down

Hold the fifth-fret barre with your first finger while you play the notes one at a time. Keep the barre in place as the notes move across the strings. In the final measure, use finger 3 or 4 for the notes at the seventh fret.

Guitar barre chord exercise in notation and TAB with a fifth-fret barre held while notes are played individually
Keep the first-finger barre down while you play through the exercise slowly. Listen for a clear, even sound from every string.

Practice tip: If one note does not ring clearly, isolate that string and move the barre finger slightly. Once the note sounds clean, return to the complete exercise.

Barre Chord Tip 4

Adjust the Barre Around Your Finger Joints

Experiment with the position of your barre finger and notice where the knuckle joints rest against the strings. The surface of your index finger is not perfectly even, so a string may sometimes fall into a softer area near a joint and produce a buzz or muted note.

If that happens, move the barre finger slightly up or down and test the strings again. A very small change in position can often improve the sound without requiring more pressure.

Barre chord finger position showing where the index finger joints rest across the guitar strings
Ex. 3: Move the barre finger slightly up or down if a string falls near a finger joint and does not ring clearly.

Barre Chord Tip 5

Raise the Guitar Neck

Tilt the neck of the guitar upward at roughly a 30 to 45-degree angle. If you are standing, a strap can help you maintain the position. If you are sitting, try a footstool or another comfortable playing position that allows the neck to remain raised.

Keeping the guitar neck at an angle can reduce strain on the fretting arm and wrist and make it easier to keep the index finger aligned with the fret. Compare your position with Ex. 4 and adjust the angle until your wrist feels comfortable.

Guitar held with the neck tilted upward to improve wrist and arm position for barre chords
Ex. 4: Raising the neck can create a more comfortable angle for the wrist and fretting hand.

Barre Chord Tip 6

Keep Your Thumb Near the Center of the Neck

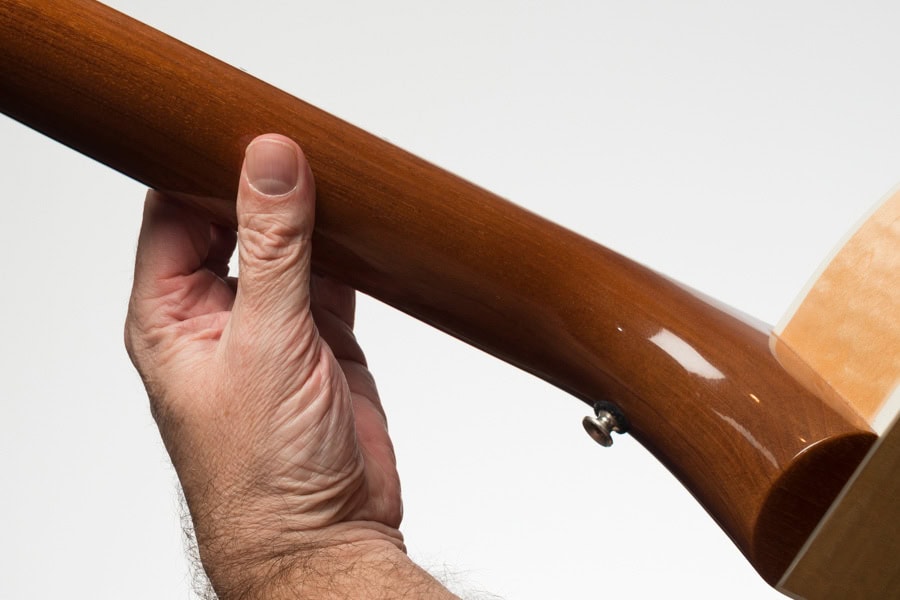
Keep your thumb approximately in the center of the back of the neck, behind the first and second fingers. This gives the fretting hand support while allowing the fingers to stay in a useful position over the strings.

If some notes are still unclear, check the position of your fingers first. You may need a little more pressure, but avoid squeezing harder than necessary. Often a small adjustment to the thumb or barre finger will improve the sound.

Thumb positioned near the center of the back of the guitar neck while playing a barre chord
Ex. 5: Keep the thumb near the center of the neck behind the first and second fingers.

Barre Chord Tip 7

Find Your Barre Chord “Sweet Spot”

Continually experiment with the position of your fingers, wrist, thumb and elbow until you find the combination that works best for your hand. Small changes can affect how evenly the barre finger contacts the strings.

If a chord buzzes or a note sounds muted, do not assume that more pressure is always the answer. A slight repositioning of the hand can often improve the clarity of the chord while keeping the fretting hand more comfortable.

Fretting hand position demonstrating a comfortable playing position for a clear guitar barre chord
Ex. 6: Experiment with the fingers, wrist, thumb and elbow until you find a position that produces a clear chord without unnecessary tension.

Why Is My Barre Chord Buzzing?

Use the sound of the chord to help identify what needs adjusting.

A buzzing or muted barre chord does not always mean that you need more finger strength. First, listen for which strings are causing the problem. Then make one small adjustment at a time and test the chord again.

What You Hear or Feel What to Check First
One or two strings buzz Move the index finger slightly up or down. A string may be sitting near one of the finger joints.
Several strings sound weak or muted Move the barre closer to the fret and check that the index finger is reasonably straight and aligned with it.
The chord sounds worse when you squeeze harder Reduce the pressure slightly and reposition the finger, thumb or wrist. Extra tension can make the hand less efficient.
Your wrist or hand tires quickly Check the angle of the guitar neck, the position of the thumb and whether you are gripping harder than necessary.
The barre works higher on the neck but not near the nut Practise the shape where it feels comfortable first, then move it gradually toward the lower frets as your control improves.

A useful test: play the strings one at a time before strumming the full chord. If five strings are clear and one is buzzing, work on that one contact point rather than changing the entire hand position.

Barre chords become much more manageable when you learn to diagnose the sound instead of treating every problem as a strength problem. Go back through Tips 1 to 7 whenever a chord stops ringing clearly and check the position of the finger, wrist, thumb and guitar before adding more pressure.

Practice Barre Chords as Movable Shapes

Once the barre sounds clean, start moving the shape to different frets.

One of the main advantages of barre chords is that the same fingering can often be moved up and down the neck. This makes a barre chord a type of movable chord: the fingering stays the same while the fret position changes the notes and the name of the chord.

Start with a barre position that feels comfortable and produces a clear sound. Play the chord, release the pressure, move the entire shape to another fret, and form it again. Try to keep the fingers moving together rather than rebuilding the chord one finger at a time.

As your control improves, practise the same shape at several positions on the neck. This develops both the barre itself and the ability to change between movable chords smoothly.

Continue Practising Guitar Chords

For chord diagrams and additional shapes, use the Guitar Chords Chart.

For a broader sequence of lessons covering chords, scales, rhythm, technique and other guitar skills, continue with the Guitar Learning Path.

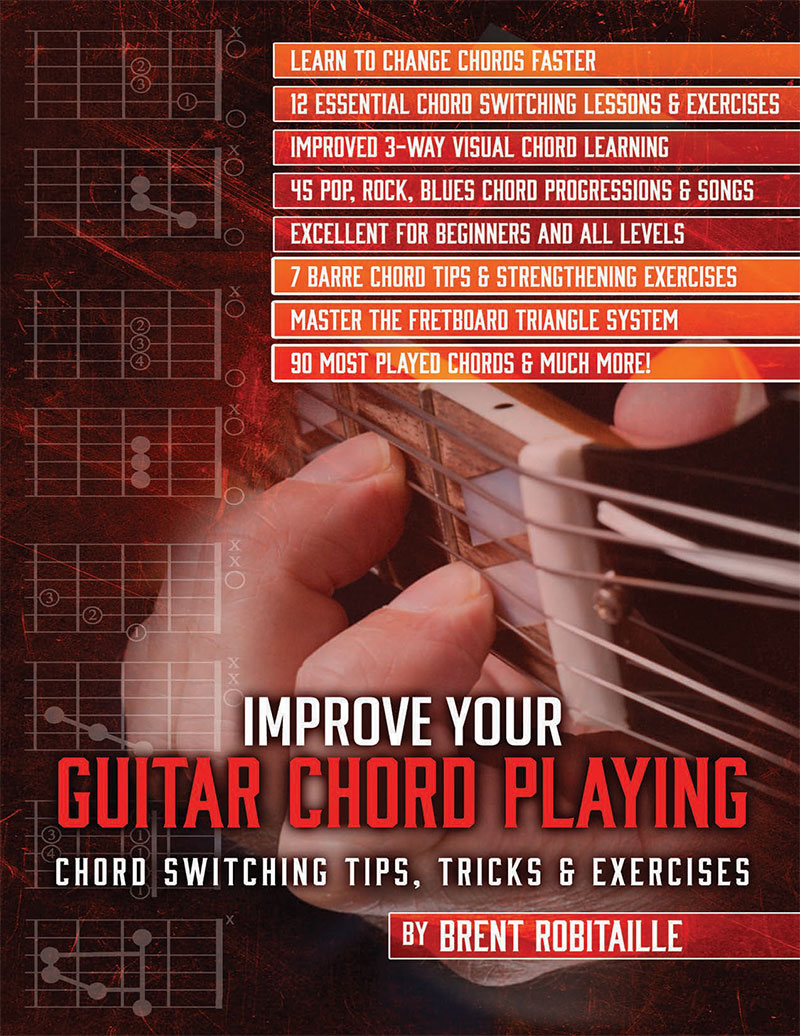
For more focused chord practice, Improve Your Guitar Chord Playing includes exercises for chord changes, barre chords, strengthening and chord progressions.

Take Your Guitar Chords Further

Two practical books for building your chord vocabulary and improving how your chords sound and connect.

Beginner Guitar Chord Book by Brent C. Robitaille

Build Your Chord Vocabulary

Beginner Guitar Chord Book

A good choice if you are still building your basic chord vocabulary. The book starts with easier beginner shapes and essential chords, then continues into sharps and flats, barre chords, power chords and movable shapes.

  • 99 guitar chords for beginner to intermediate players
  • Visual quizzes to help remember chord shapes
  • Barre-chord tips and exercises
  • Power chords and movable chords
  • Capo and guitar reference charts

Explore the Beginner Guitar Chord Book

Improve Your Guitar Chord Playing by Brent C. Robitaille

Improve Chord Changes and Control

Improve Your Guitar Chord Playing

Choose this book if you already know some chords and want to make them cleaner, faster and easier to use in real music. It focuses more heavily on chord switching, barre chords, progressions and practical exercises.

  • 12 chord-switching tips, tricks and exercises
  • Step-by-step chord-change practice
  • 45 useful chord progressions
  • 7 barre-chord tips with strengthening exercises
  • Strumming, fingerstyle, capo and fingerboard material

Explore Improve Your Guitar Chord Playing

Barre Chord FAQ

Quick answers to some of the most common barre chord problems.

Why do my barre chords buzz?

Buzzing usually means one or more strings are not being held firmly enough against the fret. Before pressing harder, move the index finger closer to the fret, adjust its angle, and play each string separately. A small change in finger position can often solve the problem.

Should I press harder if a barre chord does not sound clean?

Not necessarily. More pressure may help in some cases, but first check the position of the index finger, wrist and thumb. Excess pressure can make the hand tire quickly without fixing the string that is actually causing the problem.

Where should my thumb go when playing barre chords?

A useful starting position is near the center of the back of the neck, roughly behind the first and second fingers. From there, make small adjustments until the hand feels comfortable and the notes ring clearly.

Why is an F barre chord harder than barre chords higher on the neck?

Barre chords near the nut often require more control because the frets are farther apart and the strings can feel less forgiving. If the F shape is difficult, practise the same movable shape several frets higher first, then work gradually back toward the first fret.

How long should I practice barre chords?

Short, focused practice is usually more useful than continuing after the hand becomes tired. Work on producing a few clean barres, release the hand between attempts, and return to the exercise regularly. Accuracy and a comfortable hand position are more important than squeezing through a long practice session.

Blank Guitar Tablature Collection

The 6-String Blank Tablature Workbook and Reference Collection for Guitar includes:

  • Eight blank tablature and notation templates
  • A useful reference with guitar chords, scales and fingerboard charts
  • Print book Multi-Tab Workbook and Reference for Guitar 155pgs.

Add to cart for the PDF Ebook below (so you can print as many blank tab pages as you like). For the print book, go to the Amazon link above.

Pin It on Pinterest

Share This