Open D Guitar Guide
 Open D Guitar Guide
Open D Guitar Tuning
Learn Open D guitar tuning through chords, scales, progressions, blues, slide, fingerstyle, practical exercises and carefully organized learning resources.
Created by Brent C. Robitaille and Kalymi Music, this guide connects free charts, lessons, videos, books and practical study resources in one complete Open D learning system.
Last updated: August 2026
What’s in This Guide
What Is Open D Guitar Tuning?
Open D tuning is spelled D–A–D–F♯–A–D from the lowest string to the highest. When all six open strings are played together, they form a complete D major chord.
The tuning places D on the 6th, 4th and 1st strings, A on the 5th and 2nd strings, and F♯ on the 3rd string. This repeated arrangement of the root and fifth produces a full, resonant sound and makes many chord shapes easier to understand across the fretboard.
Open D guitar tuning is D–A–D–F♯–A–D, from low string to high string. Strumming the open strings gives you a D major chord, which makes the tuning especially useful for slide guitar, blues, folk, fingerstyle, Celtic music, songwriting and resonant chord voicings.
Why Learn Open D?
- Simple finger positions can produce large, resonant chords.
- The open strings provide strong root and fifth notes for blues and slide playing.
- Fingerstyle arrangements can combine melody, bass notes and sustained drones.
- Movable chord shapes follow a logical pattern across the fretboard.
- The tuning works for blues, folk, Celtic music, classical arrangements, rock, country and songwriting.
Once you understand the relationship between the open strings, roots and movable shapes in Open D, many of the same ideas can help you approach Open G, DADGAD, Drop D and other alternate tunings.
Who Uses Open D?
Open D has been used in blues, folk, slide guitar, fingerstyle and classical guitar traditions. Blind Willie Johnson recorded “Dark Was the Night, Cold Was the Ground” in 1927, and Elmore James later helped popularize the related Open D and Open E electric slide sound.
The tuning remains useful today because it supports both simple chord playing and advanced arrangements. Beginners can create satisfying sounds quickly, while experienced players can explore movable harmony, counterpoint, drones, slide phrasing and extended fingerstyle textures.
Open D vs Drop D, DADGAD and Open G
These tunings are sometimes grouped together because they alter standard guitar tuning, but they are designed for different musical purposes. The most important distinction is whether the open strings form a complete major chord.
| Tuning | Notes, Low to High | Best Starting Use | Defining Difference | Open Major Chord? |
|---|---|---|---|---|
| Open D | D–A–D–F♯–A–D | Blues, slide, fingerstyle, folk and songwriting | All six open strings form a D major chord. | Yes, D major |
| Drop D | D–A–D–G–B–E | Rock riffs, power chords and low-D bass notes | Only the 6th string changes from standard tuning. | No |
| DADGAD | D–A–D–G–A–D | Celtic music, modal accompaniment and drones | The open strings create a suspended, modal sound rather than a major chord. | No |
| Open G | D–G–D–G–B–D | Slide guitar, blues riffs and roots rhythm playing | The open strings form a G major chord. | Yes, G major |
Choosing between Open D and Open G: Open D is especially effective for ringing fingerstyle, low-D bass movement, blues and drone-based arrangements. Open G is strongly associated with slide guitar, blues riffs, roots music and Rolling Stones-style rhythm playing.
How to Tune to Open D
Open D Reference Pitches
Open D from low string to high string: D–A–D–F♯–A–D
Tuning from Standard Tuning
Standard guitar tuning is E–A–D–G–B–E. To reach Open D, lower the 6th, 3rd, 2nd and 1st strings. The 5th and 4th strings remain unchanged.

- 6th string, E to D: Lower the lowest string by one whole step. It should match the open 4th string D one octave lower.
- 5th string, A: Leave this string unchanged.
- 4th string, D: Leave this string unchanged.
- 3rd string, G to F♯: Lower the string by one half step. F♯ supplies the major third that gives the open strings their D major sound.
- 2nd string, B to A: Lower the string by one whole step. It should match the open 5th string A one octave higher.
- 1st string, E to D: Lower the highest string by one whole step.
- Final check: Play all six open strings. You should hear a clear and unified D major chord.
Check the Three D Strings
Open D contains D on the 6th, 4th and 1st strings. Play these three strings separately and together. They should blend without beating or wavering. These repeated D notes provide a useful tuning reference.
Common Open D Tuning Mistakes
- Forgetting the 2nd string: The B string must be lowered one whole step to A.
- Lowering the 3rd string too far: G moves down only one half step to F♯.
- Overshooting the low D: Use a tuner to confirm that the 6th string has reached D rather than C♯ or C.
- Not retuning after the strings settle: Lowered strings may drift after the first adjustment, so check all six strings again.
- Judging only by the open chord: Verify each string individually before making final adjustments by ear.
String Gauge Recommendation
Because four strings are tuned lower than standard tuning, some guitars may feel slightly looser in Open D. Standard light or medium acoustic-guitar strings can work well, especially when you switch between tunings.
Players who keep one guitar permanently in Open D may prefer a slightly heavier set for additional tension and a firmer bass response. A major gauge change can affect the nut slots, neck relief and intonation, so a dedicated setup may be helpful before moving to substantially heavier strings.
Practical starting point: Tune down slowly with an electronic tuner, stretch the strings gently, then check the tuning again before playing chords or slide.
The Open D Fretboard and Music Theory
Understanding the Fretboard
Open D uses the notes D–A–D–F♯–A–D from the lowest string to the highest. The repeated D and A strings create strong root-and-fifth relationships across the fretboard, while F♯ supplies the major third of the open D chord.
Learning where the root notes appear will help you understand chord shapes, scale positions, riffs and movable patterns.

Use the fretboard map to locate notes in Open D tuning. The 12th fret repeats the open-string notes one octave higher.
D major scale: D–E–F♯–G–A–B–C♯–D
Primary chords:
- I = D major
- IV = G major
- V = A major
Secondary minor chords:
- ii = E minor
- iii = F♯ minor
- vi = B minor
Use Root Notes as Your Guide
The root is the note that names the chord or scale. For example, D is the root of a D major chord and G is the root of a G major chord. Locating the root first makes it easier to understand where a chord shape belongs and how a pattern can be moved to another fret.
Some Open D chord shapes use ringing open strings and work best in a particular position. Other shapes can be moved along the fretboard when their open strings are muted or replaced by fretted notes.
Nashville Number System
The Nashville Number System describes chords by their position within a key. Instead of memorizing only the chord names D–A–Bm–G, you can recognize the progression as I–V–vi–IV.
Example: I–V–vi–IV
- In D major: D–A–Bm–G
- In G major: G–D–Em–C
- In A major: A–E–F♯m–D
Once you understand the harmonic function of the progression, you can rebuild it in another key by identifying the new I, V, vi and IV chords.
Open D Chord Library
Begin with the most useful major and minor chord shapes, then add dominant seventh chords and movable voicings. Open-string shapes provide resonance, while closed and partial-barre shapes make it possible to play in additional keys and positions.
Major Chord Shapes
Start with D, A, C and G. Practise each chord separately, then connect them in short two-chord and three-chord progressions.
Watch: Open D Major Chords

Major chord shapes shown: D, A, C and G. Follow the fingering numbers beneath each diagram and observe which strings are played open or omitted.
Minor Chord Shapes
Minor chords add contrast and are essential for progressions, blues, folk music and contemporary songwriting. Begin with D minor, A minor and B minor.
Watch: Open D Minor Chords
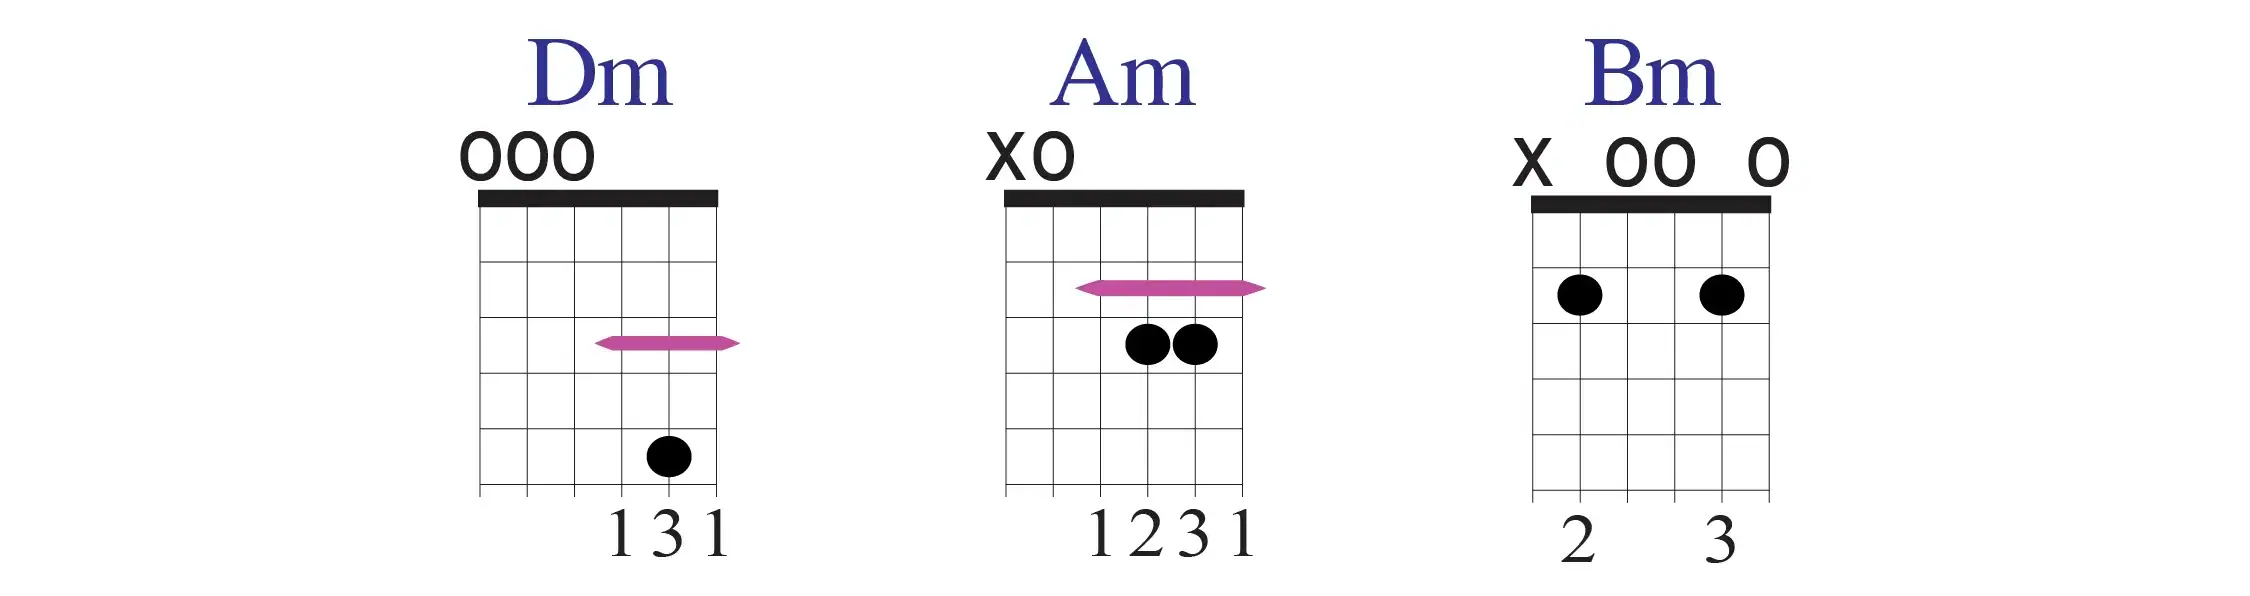
Minor chord shapes shown: Dm, Am and Bm. Practise each shape slowly and check that every intended string sounds clearly.
Dominant Seventh Chords
Dominant seventh chords create tension and movement. They are especially useful in blues progressions, turnarounds and transitions between chords.
- D7: commonly leads toward G.
- A7: commonly resolves to D.
- E7: often leads toward A or A7.
- G7: adds a blues-oriented sound to progressions involving G.
Chord inversions in Open D: A chord can place its root, third or fifth in the bass. These different note arrangements create smoother bass movement, new textures and more efficient transitions between chords.
Practice method: Learn one major shape and its related minor shape, then use both in a short progression. Name each chord aloud, identify its root note and check that unwanted strings are muted.
Open D Scales and Soloing Patterns
Scales help you locate melodic notes, build riffs and understand how solos connect to the chords underneath them. Begin with the D blues scale, then add the D major scale and B minor pentatonic scale.
D Blues Scale
The D blues scale is useful for blues, rock, country and roots-style improvisation. The repeated open D strings make the tonic easy to hear and provide natural starting and ending notes for short riffs.
D–F–G–G♯/A♭–A–C–D
The G♯ or A♭ is the chromatic blue note between G and A. Use it as a passing tone rather than treating every note as equally stable.
D Major Scale
The D major scale supports major-key melodies, chord-tone exercises, fingerstyle arrangements and improvisation over progressions in D major.
D–E–F♯–G–A–B–C♯–D
B Minor Pentatonic Scale
B minor is the relative minor of D major. The B minor pentatonic scale uses the same notes as D major pentatonic but places B at the centre of the phrase.
B–D–E–F♯–A–B
Use this scale over B minor progressions, or combine it with D major ideas when moving between relative major and minor sounds.
Three D Blues Scale Positions
These three positions divide the D blues scale into practical areas of the fretboard. Learn each position separately before connecting them.
- Open position: Combines open strings with notes near the nut. This is the easiest place to begin.
- Fifth position: Place the 1st finger around the 5th fret, the 2nd finger around the 6th, the 3rd finger around the 7th and the 4th finger around the 8th.
- Tenth position: Place the 1st finger around the 10th fret, the 2nd finger around the 11th and the 3rd finger around the 12th.

The upper diagram shows the complete Open D fretboard through the 12th fret. The lower diagrams isolate the D blues scale in open, fifth and tenth positions.
Practice method: Play each position slowly in both directions. Then create a two- or four-note riff and move it into another position without losing the rhythm.
12 Essential Open D Chord Progressions
These progressions introduce common major, minor, blues, folk, country and classical harmonic patterns. Learn the chord shapes first, then practise each progression with steady strumming or fingerpicking.
Watch: Open D Chord Progressions
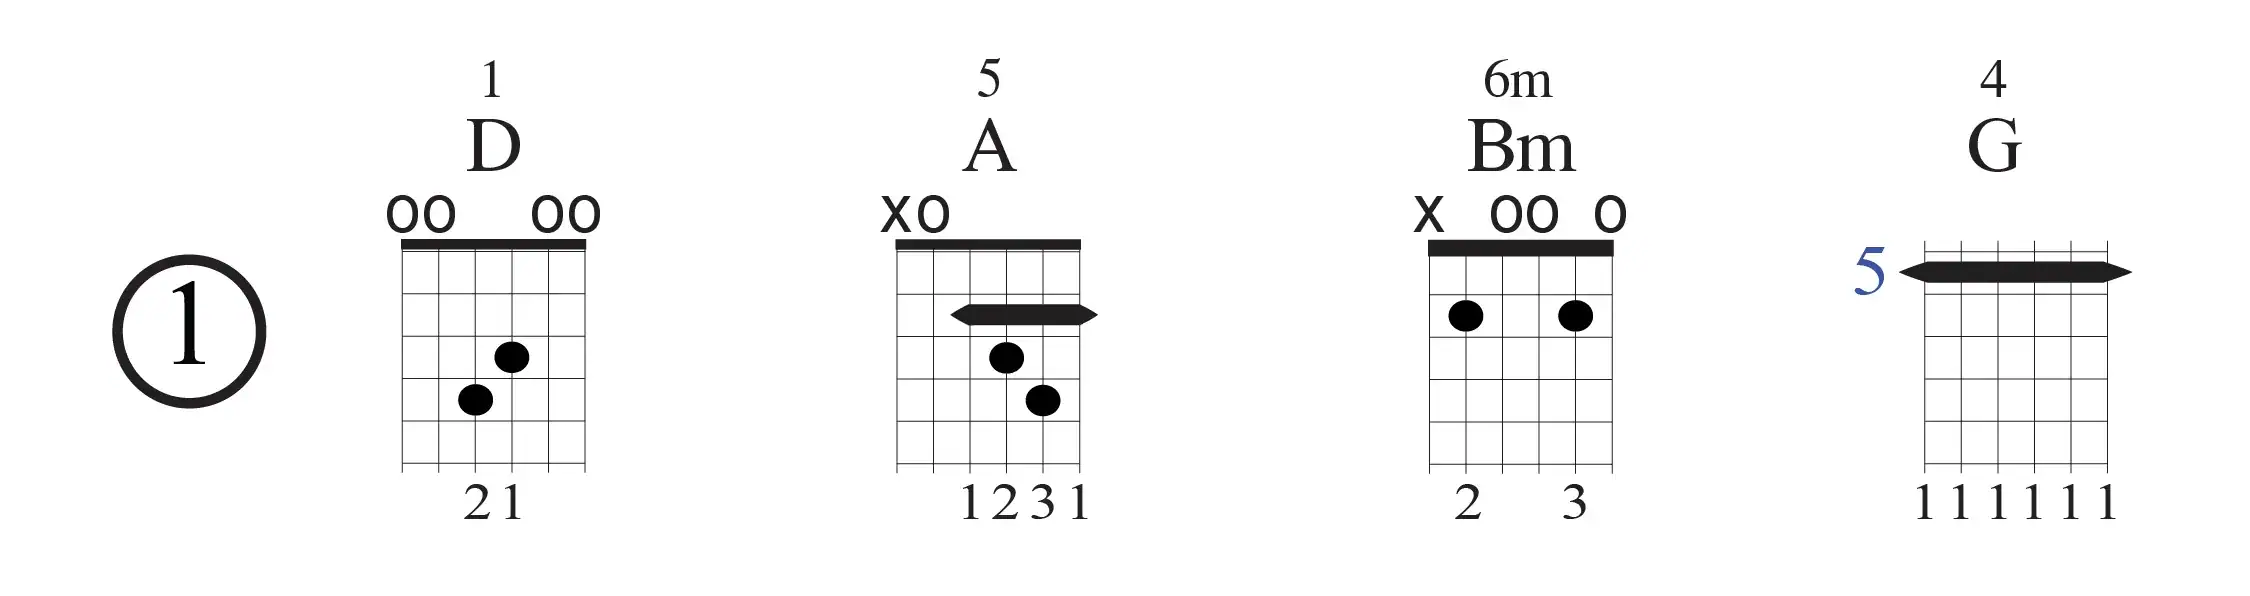
Open D chord shapes for D–A–Bm–G, one of the most useful progressions to learn first.
Practice tip: Choose one progression and play it slowly until every chord change is clean and the pulse remains steady. Repeat it with strumming, fingerpicking and different rhythmic patterns before increasing the tempo.
12-Bar Blues in Open D
The 12-bar blues is one of the most important forms in blues, rock, country and roots music. Open D works especially well because the open strings already produce the I chord: D major.
The 12-Bar Form
A common 12-bar blues progression in D uses the I, IV and V chords: D, G and A.
Common 12-bar blues progression in D:
- D major
- D major
- D major
- D major
- G major
- G major
- D major
- D major
- A major
- G major
- D major
- A major as a turnaround, or D major when ending
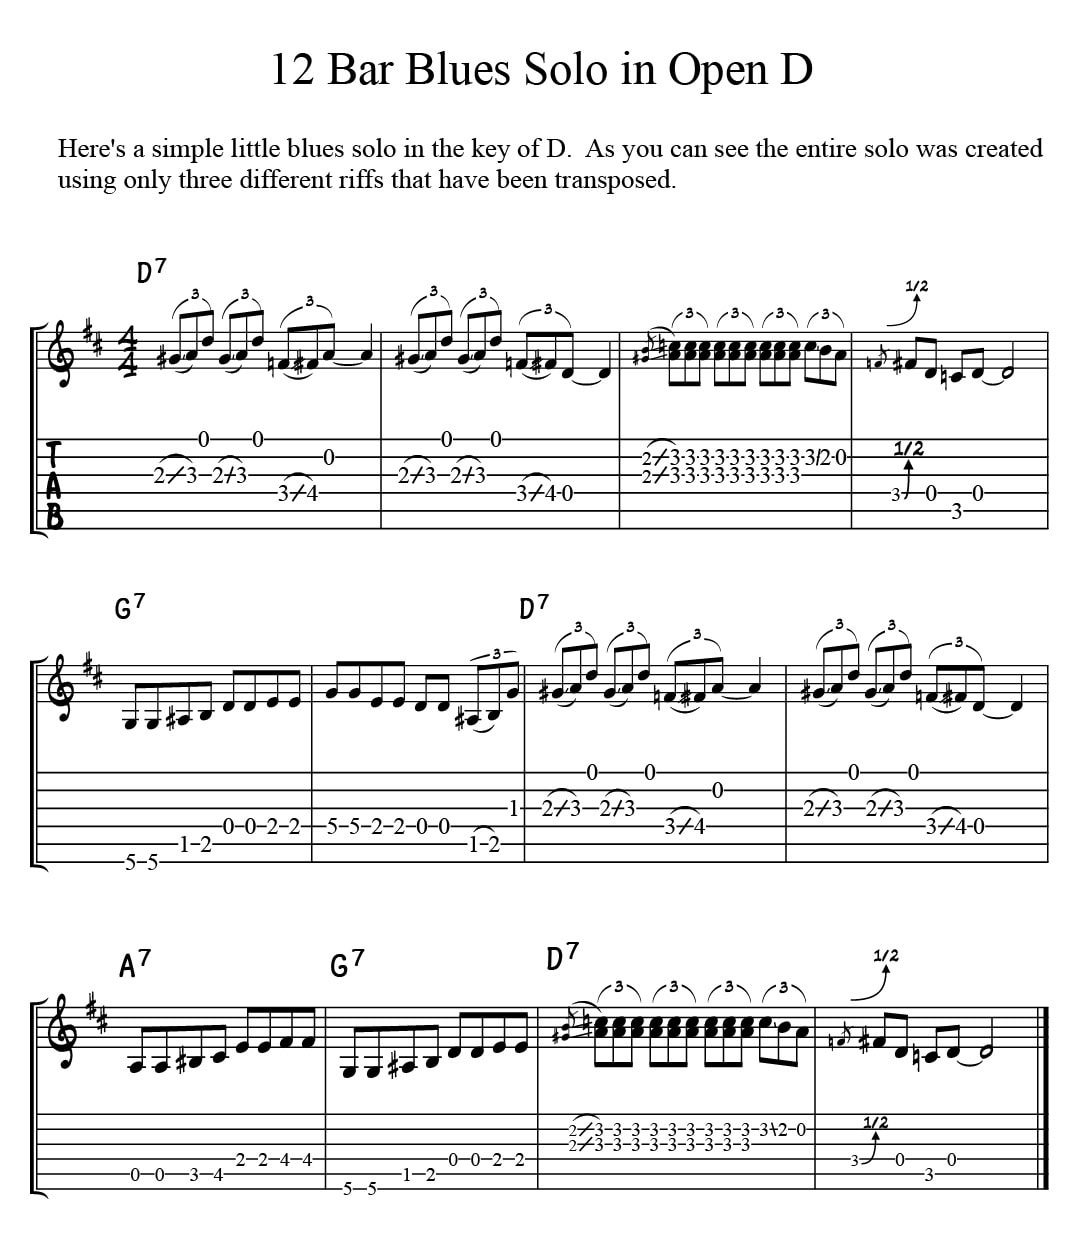
Study the written solo one phrase at a time, then connect the phrases across the complete 12-bar form.
Listen: 12-Bar Blues Solo
Kalymi Music · Make a 12-Bar Blues Solo in Open D
Try It Yourself: Open D Backing Track
Learn the solo above, then use this backing track to practise the complete form, repeat short riffs and create your own variations.
Kalymi Music · Make a 12-Bar Blues Solo in Open D Backing Track
Watch: Open D Blues Scale and Solo
This lesson breaks the solo into short riffs and then presents the complete solo with scrolling tablature.
The D Blues Scale
The D blues scale contains D–F–G–G♯/A♭–A–C–D. Use D as your main point of resolution, then experiment with the other notes to create tension, movement and blues phrasing.
Major-third colour: F♯ is not part of the D minor blues scale, but it is the major third of a D major chord. Targeting F♯ over the D chord can create the familiar movement between minor and major blues sounds.
Building a 12-Bar Blues Solo
Step 1: Create a Short Riff
Build a one- or two-bar phrase using notes from the D blues scale. Keep the rhythm clear and leave enough space for the phrase to be remembered.
Step 2: Create Complementary Riffs
Create two or three additional phrases that relate to the first one. Use repetition, call and response, rhythmic variation, sequence or contrast.
Step 3: Connect the Riffs to the Chords
Adapt the phrases as the progression moves through D, G and A. Emphasize chord tones and roots that belong to the current chord rather than playing every phrase identically.
Three quick soloing principles:
- Know the blues scale in the key you are playing.
- Build short, memorable one- or two-bar riffs.
- Repeat good ideas and change only one element at a time.
Apply Your Riffs Across the Form
- Bars 1–4, D chord: Establish your main riff and resolve important phrases to D.
- Bars 5–6, G chord: Adjust the phrase toward G chord tones. Closed movable patterns can be shifted five frets above D.
- Bars 7–8, D chord: Return to the original D idea or answer it with a variation.
- Bar 9, A chord: Create tension by emphasizing A or another note from the A chord.
- Bar 10, G chord: Move downward harmonically and prepare the return to D.
- Bars 11–12: Resolve to D, then use A as a turnaround when repeating the form.
Blues phrasing tip: Try bending F slightly toward F♯, or play F followed by F♯. The movement between the minor and major third is an important part of the blues sound.
Open D Technique Guide
Slide Guitar in Open D
Open D is well suited to slide guitar because several strings can be played together to produce a major chord. A slide may be worn on the ring finger or little finger, depending on comfort and how many fingers you want available for fretted notes.
- Position the slide above the fret: Place it directly over the metal fret wire rather than behind the fret as you would with a fretting finger.
- Use light pressure: The slide should contact the strings without pressing them down against the frets.
- Keep the slide parallel: When playing several strings, align the slide with the fret so the notes remain in tune.
- Mute unwanted noise: Lightly touch the strings behind the slide with an available finger and mute unused strings with the picking hand.
- Practise approach slides: Begin below the target note and move smoothly into pitch.
- Add controlled vibrato: Move the slide slightly above and below the target fret while keeping the motion even.
- Use open-string drones: Allow selected open strings to ring while playing a melody or slide phrase on another string.
Intonation check: Stop the slide directly above the fret and listen carefully before adding vibrato. Accurate pitch should come before expressive movement.
Fingerstyle in Open D
Fingerstyle playing can separate bass notes, inner harmony and melody while allowing open strings to sustain. Begin with a consistent picking-hand assignment before working on more complex patterns.
Picking-hand guide:
- T = thumb
- I = index finger
- M = middle finger
- R = ring finger
The thumb usually handles the lower bass strings, while the index, middle and ring fingers play the upper strings. Keep the hand relaxed and avoid lifting the fingers farther than necessary.
Travis Picking in Open D
Travis picking combines an alternating thumb pattern with syncopated upper-string notes. The thumb creates a steady rhythmic foundation while the fingers add melody and harmony.
Learn each pattern slowly and separately. Once the bass remains steady, apply the pattern to different chords and begin changing one upper note at a time.

Four Travis-picking patterns for Open D. Practise each pattern at a slow tempo while keeping the alternating bass even.
Practice method: Isolate the thumb part first. When the bass pattern feels automatic, add one upper-string note at a time. Increase the tempo only when the rhythm remains even and every note sounds clean.
Which Open D Resource Should You Start With?
Choose the resource that matches what you want to learn next. You can begin with the free chord chart, develop your chord vocabulary, study blues improvisation or build a complete Open D repertoire.
Start with the Free Chord Chart
Download 48 essential Open D chord shapes and keep them beside you while working through this guide.
Use the Open D Guitar Chord Poster
Choose this when you need a larger reference containing 108 chord diagrams, a fretboard map and a bonus Open D chord book PDF.
Build Riffs and Solos
Use 101 Blues Riffs and Solos in Open D to develop scale patterns, short phrases, complete solos and practical blues vocabulary.
Build an Open D Repertoire
Choose from classical guitar, Celtic flatpicking, Christmas arrangements and individual works arranged specifically for Open D.
Open D Guitar: The Complete Reference
This expanded Open D reference system is currently in development. It brings together chords, scales, progressions, techniques, repertoire and practical study material in one organized resource.
Status: Coming soon from Brent C. Robitaille and Kalymi Music.
Kalymi Music Open D Resources
These books, charts, companion materials and arrangements provide structured ways to continue beyond the introductory material in this guide.
Learn the Tuning

Open D Guitar Chord Poster
A full Open D wall reference with 108 chord diagrams, a fretboard map and a bonus Open D chord book PDF.
Build Blues Vocabulary

101 Blues Riffs and Solos in Open D
A complete handbook containing riff ideas, scale patterns, solo frameworks and practical Open D blues vocabulary.

101 Blues Riffs Companion Resources
Access the supporting materials, audio tracks and video demonstrations connected to the book.
Build an Open D Repertoire
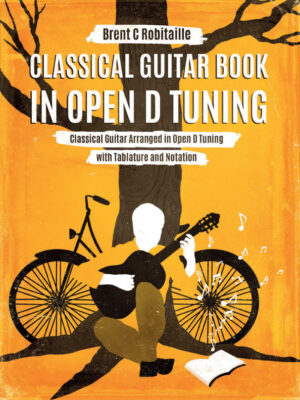
Classical Guitar in Open D
Classical guitar arrangements written specifically for the resonance and chord layout of Open D tuning.
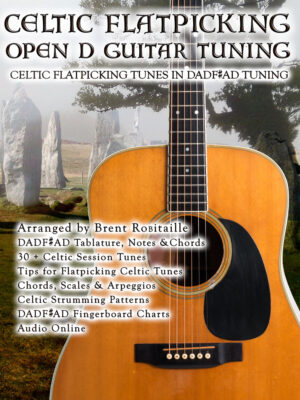
Celtic Flatpicking in Open D
Develop flatpicking technique and learn Celtic repertoire arranged for Open D guitar.

Open D Guitar Christmas Songbook
A collection of Christmas music arranged to use the full resonance of Open D tuning.
Satie Gymnopédie No. 1
An individual classical guitar arrangement in Open D tuning with notation and tablature.
Haydn Serenade
A classical guitar arrangement of Haydn’s Serenade written for Open D tuning.
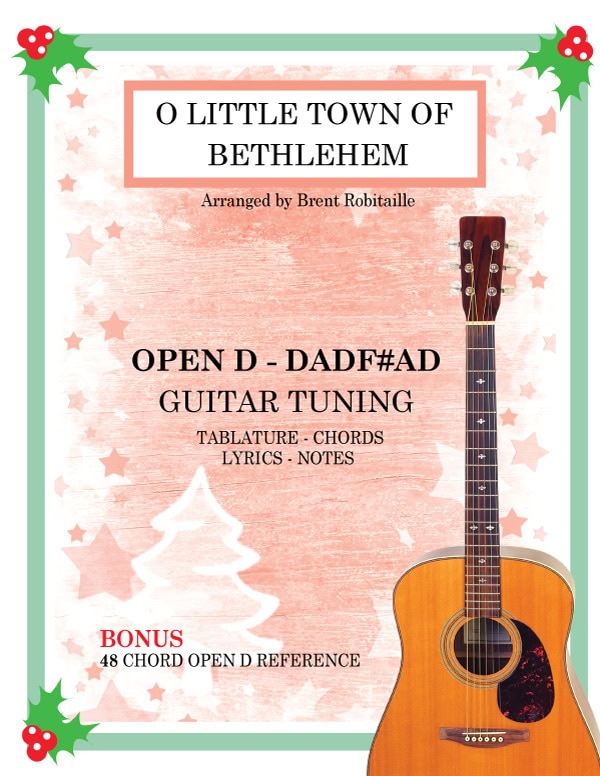
O Little Town of Bethlehem
A Christmas guitar arrangement in Open D tuning with music notation and tablature.
Open D Apparel
Open D clothing is listed separately from the instructional resources above.


The Kalymi Method: How to Practise Open D
Reading a lesson or playing an example once is not enough to make it reliable. To learn an Open D chord, riff, scale pattern or tune, you need a focused process that develops understanding, clean execution, memory and practical use.
This six-step process reflects the teaching method I have developed through years of working with students. Use it as a starting point and adjust it to suit how you learn best.
The Six-Step Learning Process
- Look: Examine the example before playing. Notice the key, chord, rhythm, fingering, picking direction, position and ending.
- Understand: Explain what is happening in plain language. Identify the chord, scale, rhythm or technique involved.
- Play: Perform the example slowly and cleanly. Correct mistakes before increasing the tempo.
- Recall: Play it from memory without looking at the page, diagram or tablature.
- Use: Apply it to a progression, backing track, tune, improvisation or arrangement.
- Move: Transfer it to a different key, tempo, fretboard position, rhythm or musical setting.
Check Your Progress
Use these questions to find out whether the material is becoming secure rather than merely familiar.
- Can you remember it without looking at the page?
- Can you play it cleanly at a slow and steady tempo?
- Can you still play it tomorrow without relearning it?
- Can you move it to another key, tempo, rhythm or fretboard position?
- Can you use it to create a variation, build a riff or contribute to an improvisation?
The first two checks may happen quickly. The third reveals whether the material has entered long-term memory. The fourth and fifth show that you can use the idea creatively and independently.
Isolate the Problem
Repeating an entire progression while making the same mistake can reinforce the problem. Identify the precise chord change, rhythm, fingering or technique that is breaking down.
Instead of: “I’m going to practise this progression.”
Say: “I’m going to play bars 5–8 slowly until the rhythm is steady.”
Instead of: “I need to get faster.”
Say: “I’m going to play this riff cleanly at 70 bpm three times before raising the tempo.”
Instead of: “I keep making mistakes.”
Say: “The change from D to A is awkward, so I will isolate and repeat that movement.”
Good practice is specific. Slow the difficult part down, correct it and then return it to the complete progression, solo or tune.
How to Practise Different Open D Material
Chords
Do more than memorize the shape. Name the chord, locate its root and practise moving to and from related chords. Test yourself later without using the diagram.
Chord Progressions
Keep the picking or strumming hand moving steadily. Use a metronome, feel the main pulse and listen for uneven transitions. Practise at slow, medium and faster tempos.
Blues Scales
Learn one position at a time. Play the pattern cleanly, use it with a backing track and then connect it to another position. Create short riffs instead of only running the scale up and down.
Fingerstyle Patterns
Organize the thumb and fingers before increasing speed. Practise the bass part separately, add the upper notes gradually and keep the hand relaxed.
Slide Guitar
Focus on accurate pitch, clean muting and coordination between the two hands. Practise arriving directly above the fret before adding vibrato or faster movement.
12-Bar Blues
Begin with one or two short riffs. Learn where the D, G and A chords occur, then adapt your phrases to the changing harmony. Add complexity only after the form and rhythm are secure.
What to Practise First
Players who are new to Open D should begin with rhythm, chord changes and short riffs before attempting fast solos or complex arrangements.
- Learn the tuning notes and basic open-position chords.
- Practise smooth changes between D, G, A and B minor.
- Work through several of the essential chord progressions.
- Learn the D blues scale in open position.
- Add the fifth- and tenth-position blues scale patterns.
- Practise one Travis-picking pattern at a slow tempo.
- Learn the basic 12-bar blues chord sequence.
- Create and repeat a short blues riff of your own.
Speed comes later. Clean tone, steady rhythm, reliable memory and controlled movement come first.
Set a Realistic Practice Schedule
You do not need to practise seven days a week. Choose a schedule you can maintain. Three or four focused sessions may be more useful than an unrealistic daily plan that you abandon.
Choose one main category for each session, such as chords, progressions, scales, blues, fingerstyle or slide. Work on only a few items at a time so that each one receives enough attention.
Keep a simple written record of what you practised and where you stopped. For example: “Tuesday: D–A chord changes and D–A–Bm–G progression” or “Thursday: D blues scale in open and fifth positions.” This gives you a clear starting point for the next session.
Do not measure progress only by the number of pages completed. The real test is whether the material returns the next day and appears naturally when you play.
Key practice principle: Consistency beats intensity. A focused 15-minute session can be more productive than a long, unfocused session once a week. Practise with a specific goal rather than playing passively.
History of Open D and Vestapol Tuning
Open D has a documented history extending through classical guitar, parlor music, folk traditions, blues, slide guitar and contemporary playing. The tuning is also associated with the historical term Vestapol, a variant of the title Sebastopol.
Henry Worrall’s guitar piece Sebastopol was published in Cincinnati in 1860. The work became closely associated with the tuning D–A–D–F♯–A–D and demonstrated how open strings, sustained bass notes and resonant chord shapes could be used in a substantial solo-guitar composition.
The name Vestapol developed as a folk variation of Sebastopol. Over time, the title became associated not only with Worrall’s piece but also with the Open D tuning used to perform it.
Sebastopol in Open D and Spanish Fandango in Open G became important pieces within American parlor-guitar teaching. Guitar tutors and instructional collections helped establish both tunings as recognizable alternatives to standard tuning.
Open D was adopted by blues and slide-guitar players because the open strings form a complete major chord. The tuning allowed performers to combine bass notes, drones, chordal slide movement and vocal-style melodic phrasing.
Blind Willie Johnson recorded Dark Was the Night, Cold Was the Ground in 1927. The performance became an enduring example of expressive slide guitar and demonstrated how an open tuning could support melody, harmony, rhythm and sustained resonance at the same time.
Elmore James helped popularize the related sounds of Open D and Open E through his electric slide-guitar style. His recordings influenced later blues and rock guitarists and helped bring open-tuned slide playing into amplified popular music.
Open D continues to be used for blues, slide guitar, folk music, fingerstyle arrangements, Celtic music, country, rock, classical adaptations and songwriting. Its value comes from the combination of a complete open major chord, repeated root notes and a fretboard layout that supports both simple accompaniment and advanced arranging.
Vestapol and Open D: The two terms are closely connected, but they are not always used in exactly the same way. Open D identifies the tuning itself, while Vestapol may refer to the historical tuning tradition, related repertoire or musical style associated with Sebastopol.
Frequently Asked Questions
Is Open D good for beginners?
Yes. Open D is beginner-friendly because the open strings form a complete D major chord and simple finger positions can produce full, resonant sounds. Begin with accurate tuning, basic D, G and A chord shapes, steady rhythm and short riffs.
Is Open D harder than standard tuning?
Open D is not necessarily harder than standard tuning. It uses a different fretboard layout and different chord shapes, but it can make slide guitar, blues, fingerstyle playing and drone-based arrangements easier to understand. The difficulty depends on what you want to play and how consistently you practise.
What is the best way to start learning Open D?
First, memorize the tuning notes D–A–D–F♯–A–D and learn to tune accurately. Next, practise the basic D, G, A and B minor chords, one simple progression and the open-position D blues scale. Add fingerstyle, slide and movable shapes only after the basic chord changes and rhythm feel secure.
Follow the Open D practice method for a structured starting sequence.
What string gauges should I use for Open D?
Standard light or medium guitar strings can work well, especially when you regularly switch between standard tuning and Open D. Because four strings are tuned lower, some players prefer a slightly heavier set for firmer tension and a stronger bass response.
Substantially heavier strings may require adjustments to the nut slots, neck relief or intonation. Consider a professional setup before making a major gauge change.
Will Open D damage my guitar?
Open D normally places less overall tension on the guitar than standard tuning because four strings are lowered. Retuning between standard tuning and Open D is generally fine on a properly maintained instrument.
If the strings feel excessively loose, buzz against the frets or create tuning problems, a different string gauge or setup may help.
Can I use a capo in Open D?
Yes. A capo raises the entire Open D tuning while preserving the same chord shapes. Placing the capo at the 2nd fret changes the open chord from D major to E major. Other capo positions let you move the same shapes into additional keys.
Check the tuning after attaching the capo because string pressure can pull some notes slightly sharp.
How is Open D different from Open G?
Open D is tuned D–A–D–F♯–A–D and produces a D major chord. Open G is tuned D–G–D–G–B–D and produces a G major chord.
Open D is especially useful for ringing fingerstyle, blues, low-D bass movement and drone-based arrangements. Open G is strongly associated with slide guitar, roots riffs, blues and Rolling Stones-style rhythm playing.
Should I use a dedicated guitar for Open D?
A dedicated guitar is helpful but not required. It eliminates repeated retuning and allows the string gauge and setup to be optimized for Open D.
Using one guitar for several tunings is also practical. Tune slowly, check each string carefully and allow the strings to settle before playing.
Get New Kalymi Music Lessons and Resources
Receive occasional updates about new guitar lessons, free reference materials, books and Kalymi Music learning resources.