
Welcome to the fantastic world of classical guitar!
Maybe you have wanted to learn guitar and not sure where to start or have played for a while but want to try something different. I imagine you already have a nylon-string classical guitar or are thinking of buying one and want to get a basic overview of what’s involved. If so, you are at the right place! I have put together ten essential facts and tips you need to know to succeed on classical guitar.
Lesson one will deal with the essential technical points to get started the classical guitar, the basic holding position, the right- and left-hand, the four main strokes, fingering, and hand preparation. Lesson two (link to lesson two) will deal with more advanced concepts and interpretative skills. After completing both lessons, you will have a general understanding of how to learn the classical guitar.
Before we get started here’s an audio track below from the Classical Guitar Book in Open D Tuning you can listen to while you read the post.
First, let’s start with the finger names and how to hold the guitar.
1) Finger names and holding the guitar
In classical guitar music, the finger numbers are often shown in the notation for preferred fingerings. Keep in mind, the fingerings are suggestions, and there are usually several possibilities for most situations you will encounter. If you don’t know already, let’s learn the finger names for both hands:

On the right hand, the thumb symbol is p (polex); the index finger is i (index); the middle finger is m (medius), and the ring finger is a (annularis).
On the left hand, numbers are used to show the finger number, as shown in the diagram above.
Holding the classical guitar
Most classical guitarists put the guitar on the left knee, keeping the leg elevated with an angled footstool. This position keeps your right-hand in the optimal position by the soundhole and the left-hand and wrist straighter instead of bent, giving you greater reach and flexibility.

Notice the right-hand position is approximately at a 45o angle with the thumb in front of the fingers. This hand position will allow your thumb and fingers to move freely and let the fingers move towards the palm as you execute a stroke.

Try to keep your wrist slightly tilted, the hand still, and the arm muscles in a state of equilibrium, meaning the muscles are not pulling up or down.


Examples of the wrist tilted and overextended.
2) Free stroke – fingers and thumbs
There are basically four stokes you need to learn on the classical guitar. The free stroke with the thumb and fingers, and the rest stroke with the thumb and fingers. Free stroke (Tirando) is the most common technique for the right-hand on the classical guitar. Much of classical guitar music requires playing arpeggios, and the free stroke is the natural way to pluck the strings. The free stroke is, as it sounds, “free.”
The fingers should glide past the strings without stopping or hitting the next string. To execute this action, strike the string with the fleshy part of the finger first, then the nail hits the string in passing through. I mention this because I’ve had students ask if they should play on the nail only without the flesh hitting the string.


Free Stroke – the finger brushes against the flesh, hits the nail, follows through towards the palm.
Free stroke technique:
The technique for free stroke is as follows:
1) keep the fingers and thumb at a 45o angle.
2) Keep the hand relatively still, and the wrist elevated enough so the fingers have space to freely strike the strings.
3) Move the finger from the top knuckle joint (MCP joint), keep the other two joints (PIP and DIP joints) relaxed but controlled. Think of it like a continuous 1-2-3 movement.
4) Allow the finger to move towards the center of your palm.
Let’s now move on to the rest stroke next.

3) Rest stroke with fingers and thumb
The rest stroke (apoyando) is not used as much as the free stroke but essential to master classical guitar. Rest stroke is when the finger comes to rest against the next string. For example, play the first string with your index finger and let it stop or rest against the second string without playing the second string.


Rest Stroke – the finger brushes against the flesh, hits the nail, follows through to rest on the second string.
The rest stroke is typically harder to perfect as it requires a slight hand position change. The rest stroke should provide a rounder, fuller tone and is excellent for accenting notes and pulling out the melody in a piece. Practice the rest stroke until you have figured out your best wrist position and you can hear a difference between the two strokes.
Always listen carefully to your tone and put yourself in the place of the listener. Ask yourself, how does this sound? It’s not just about playing the right notes; it’s also about the tone!
Here’s another track below to get you through the rest of the post. Spanish Romance is likely the most popular classical guitar piece and it’s by a very famous composer “Anonymous.”
4) Right-hand fingering
There are some general rules for right-hand fingering: the thumb (t) usually plays on the 4th, 5th and 6th strings, sometimes on the 3rd and less often on the 2nd string.
The index (i) and middle finger (m) can play on any string, especially in scales, but for arpeggiated chords and most pieces, the index and middle usually play on the 4th to 1st string. The ring finger (a) also plays on every string but will usually stick to the 1st or 2nd string.
Another left-hand fingering tip to know is the guide finger. This is when a finger stays on the string while shifting. Guide fingers will help with position changes and accuracy.

5) Preparation of left and right fingers and hand positions
To play smoothly (legato) and connect notes clearly and efficiently, you must prepare your hand position and fingers before the notes are played. This means your fingers are ready to play and drop on the fretboard slightly before needed or at least close to the position your hand will be in.
Preparation, or planning out in advance, is an important step when figuring out tricky passages or learning new music. The best advice is to always look ahead to where your hand, wrist, and fingers will be in advance. Sometimes, I play a section of the piece in reverse until an efficient fingering is chosen. My teacher regularly asked me to play the whole piece backwards from finish to the start!
Hand preparation is not limited to the left hand. You can also prepare the right-hand fingers. This means to hover the right-hand fingers over the upcoming note(s) without actually touching the string. To do this, play the first group of notes with the right hand, then lift the fingers to the next note(s) and hover over the strings without playing, then play the notes and continue on. In essence, you are breaking down and slowing the finger movement to program your muscle memory. This exercise will also sync up the left and right-hand fingers and coordinate the notes.
Piano players often learn pieces by play playing hands separate then gradually playing both hands together. This practice method also works on the guitar, so occasionally, try playing through a piece with hands separate.
So, I hope you learned a few things in lesson one! Let’s move on to some more advanced concepts and important interpretive skills. Click here for: How to Play Classical Guitar – Lesson Two.
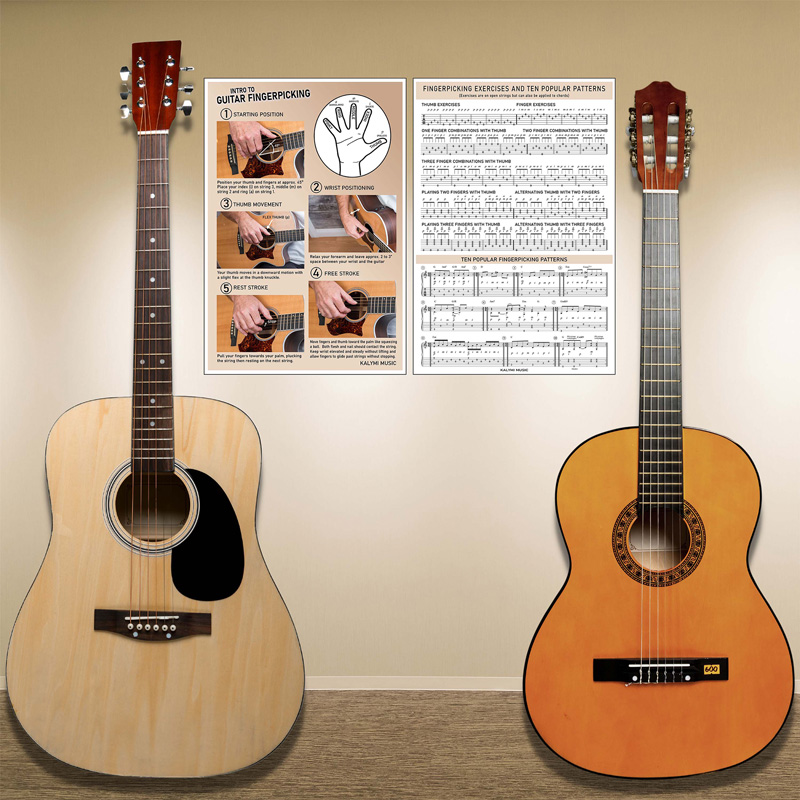
Guitar Fingerpicking Poster
- Elegant guitar fingerpicking poster set showing essential fingerpicking techniques and exercises.
- Two posters included – 1) Guitar fingerstyle technique, and 2) 37 Fingerpicking exercises and 10 popular patterns.
- Convenient size poster 12” x 18”. Side by side, the two posters are 24” x 18”.
- An excellent reference for all guitar players learning or reviewing the most important aspects of playing fingerstyle guitar.
- All posters have a gloss finished printed on 100# Digital Gloss Text.
This two-poster introduction to guitar fingerpicking poster will get you started playing with your fingers. 5 essential tips, 37 exercises and the top 10 fingerstyle patterns included. Audio tracks below.

Celtic Flatpicking Open D Guitar Tuning
Celtic Guitar Flatpicking in Open D Guitar. Tuning your guitar to DADF#AD or “Open D” tuning compliments Celtic guitar music perfectly.
- 30+ Celtic session tunes and songs. Jigs, reels, songs, hornpipes, waltzes.
- Tips for Flatpicking and Ornamentation.
- DADF#AD chords and arpeggios.
- Celtic strumming patterns.
- Campanella major, minor and modal scales.
- DADF#AD fingerboard chart.
- A selection of audio and interactive tracks below

101 Blues Riffs and Solos in Open D Guitar Tuning
Take your Open D guitar playing to the next level with “101 Blues Riffs & Solos in Open D Guitar Tuning.” The most complete instructional book ever written exclusively in DADF#AD tuning. Using a combination of slide, fingerstyle and pick playing, you will cover all the bases needed to develop a solid technique in open D guitar. Everything you need to master the blues with essential lessons in DADF#AD guitar tuning!
Includes:
- Master the Blues in Open D Guitar Tuning
- Slide, Fingerstyle and Picking Riff and Solos
- Traditional, Delta, Rock, Funk and Jazz Blues
- Extensive Scale, Chord, and Arpeggio Charts
- A Complete Course for Open D (DADF#AD)
- Audio Tracks Bellow