The Kalymi Loop Method
Guitar Looper: Build Better Loops with the Kalymi Loop Method
Loops, layers, notation, and timing. Everything you need to turn one guitar into a full arrangement.
Most looper instruction begins with the pedal: which buttons to press, where to put it in your signal chain, which model to buy. This page begins with the music. A good loop is not a feat of footwork. It is an arrangement you build one layer at a time, where every part knows its job, stays out of the way of the others, and returns cleanly to the top so the whole thing can repeat. The Kalymi Loop Method is how you plan that arrangement before your foot ever touches the pedal.

The Framework
Four decisions behind every loop
A strong guitar loop depends on four musical decisions: structure, register, harmony, and timing. Miss any one of them and the loop falls apart at the repeat, turns to mud, or never locks in. The Kalymi Loop Method is built around these four ideas.
Structure
Know what each musical layer is doing. A loop is not one performance. It is several small parts stacked together, and each one has a job.
Register
Keep bass, chords, rhythm, and melody out of one another's way. Five good parts can still sound terrible together if they crowd the same space.
Harmony
Choose phrases and progressions that return naturally to their beginning, so the loop can repeat without a seam you can hear.
Timing
Close the loop exactly where the next pass begins. Looping makes the phrase boundary unusually unforgiving. The end of one pass has to connect cleanly to the beginning of the next.
The Kalymi Loop Method brings those four ideas together into one way of planning, notating, and playing a loop. Each section below takes them one at a time.
Free Resources
Everything you need to start
Everything here is free. Download whatever is useful on its own, or get the whole set in one email.
Get the complete Looper Starter Pack
Everything in one download: the Method Legend, both Parts Pages, a blank Loop Chart, the Checklist, and the drum grooves in loop and extended formats. One email and it is yours.
Get the Starter PackThe resources on this page help you understand and explore looping. If you would rather follow a sequenced path from first loop to full arrangement, the Looper Guitar Learning Path is the step-by-step companion.
The Basics
What is a guitar looper?
A guitar looper records a short phrase you play, then plays it back on repeat while you add more parts over the top. Each new part is layered onto the loop without erasing what came before, so one guitarist can build the sound of a whole band, live, one pass at a time.
How it works, in three moves
Record, playback, overdub. You record a phrase and the looper begins repeating it the moment you stop. While it repeats, you overdub: play a second part that gets added to the loop, then a third, and so on. That is the core mechanic. Everything else is musical judgment about what to play and when.
Acoustic or electric
Looping works on both. An acoustic player might tap a rhythm on the body, add a bassline, then a chord part. An electric player might stack a riff, a pad, and a lead. The Kalymi Loop Method applies the same way to either.
Where the looper sits in your signal chain
A looper is commonly placed near the end of the chain, after your drive, modulation, and delay, so the loop captures your finished sound. But the position is a musical choice, not a fixed rule. It depends on whether you want effects recorded into the loop or applied to the whole loop afterward. If you want a reverb to wash over the entire repeating loop rather than being baked into one layer, you might place it after the looper instead.
Knowing how to operate the pedal is the easy part. Knowing what to play into it, in what order, so the layers add up to music instead of clutter, is the part worth learning. That is what the rest of this page is about.
Related reading: Top 10 Tips to Buy the Best Guitar Looper Pedal · How to Make a Layered Loop on Your Guitar Looper Pedal
The Flagship
The Kalymi Loop Method
The Kalymi Loop Method is a system for arranging guitar loops as separate musical layers rather than treating looping as a sequence of pedal operations.
The five layers
The five Kalymi loop layers are Riff, Bass, Chord, Rhythm and Extra. Each one has a clear job:
- Riff carries a recognizable motif, hook, or melodic identity.
- Bass provides the low foundation and often outlines the harmonic movement.
- Chord fills in the harmony between the bass and the melody.
- Rhythm provides pulse and attack, often muted or percussive.
- Extra adds colour: a harmony line, a countermelody, a texture, whatever the piece is missing.
Not every loop uses all five, and the layers do not have to enter in that order. The point is that before you record anything, you know which jobs need filling and which part is doing each one.
Three questions, three representations
A complete loop arrangement answers three questions, and the Kalymi Loop Method gives you a way to represent each one.
WHEN does each layer happen? That is the Loop Chart.
WHERE does each layer belong musically? That is the Register Map.
A Parts Page shows what each layer plays. A Loop Chart shows when each layer enters, repeats, mutes or returns. Together with the Register Map, they describe a loop completely: what, when, and where.
The Parts Page
The Parts Page is the format used throughout the Kalymi looper books. Each layer gets its own short staff of standard notation and tab, labeled by job, with a record order shown in the header. It tells you exactly what to play for every layer of the loop.

The Loop Chart
The Parts Page tells you what to play. It does not show the shape of the performance: which layer enters first, when a part drops out for a breakdown, when it returns, where the whole thing ends. The Loop Chart adds that. It is a simple grid. Each row is one of the five layers, each column is a pass through the loop, and a mark shows when each layer records, plays, mutes, or returns. One glance shows the entire arrangement as a shape in time.
Loop Chart: Easy Minor Blues
The continuity that ties it together
This is the part worth seeing in one piece. A single loop can be represented four ways, and they are all the same music: the Parts Page (what to play), the Loop Chart (when to play it), the isolated audio layers (each part on its own), and the complete performance (all of it together). Move through those four and you understand not just how to press the pedal, but how the arrangement is built.
Worked example: Easy Minor Blues
Here is the Easy Minor Blues performed live, built from the same five layers. It is played a little loose from the written page, and that is the point: like all music, a loop is never played the same way twice, which is a pleasant irony for something called a loop. The notation gives you the arrangement. What you do with it is yours. Just below, you can build this same loop yourself, one layer at a time, right in your browser.
Notation in action
For a fuller look at how the layers are written and stacked, this walk-through builds a layered loop part by part:
Interactive
Try it: build the loop yourself
Reading about layers is one thing. Hearing them stack up is another. Below is the Easy Minor Blues loop from the looper books, split into its five layers. Add them one at a time and listen to how the arrangement fills out, or pull one away and hear what its job was. This is the Kalymi Loop Method in your browser, no pedal required.
Build the Loop: Easy Minor Blues
Tap a layer to add it to the loop. Tap again to drop it out. Everything stays locked to the same loop, so you can hear exactly what each part adds.
Register: each part sits in its own space, so nothing crowds out the rest.
Harmony: the progression returns to its start, so the loop repeats without a seam.
Timing: every layer shares the same loop boundary, so they stay locked together.
Notice that the loop still makes sense with layers removed. That is not an accident. Each part was written to stand on its own and to leave room for the others. That is what the next two sections are about: giving every layer enough space, and making the whole progression circle back cleanly.
Arranging
The Register Map: one guitar, full band
Five good parts can still sound terrible together. If the bass, the chords, and the riff all crowd into the same range with the same busy rhythm, the loop turns to mud no matter how well each part is played on its own. The Register Map is how you give every layer enough room to stay clear.
The Register Map separates loop layers by musical function and frequency range so that overdubs remain clear rather than competing for the same space. Register is the first way to create that separation, but rhythm, articulation, note length, and density matter too.
| Layer | Primary role | Typical space | Watch for |
|---|---|---|---|
| Bass | Foundation | Low register, sparse | Competing low chord tones and too much sustain |
| Chord | Harmony | Low-middle to middle register | Covering the bass or filling the same space as the riff |
| Rhythm | Pulse and attack | Short, dry, percussive space | Too much sustain or harmonic information |
| Riff | Motif, hook, melodic identity | Middle to upper register | Being buried inside the chord texture |
| Extra | Colour and contrast | Whatever space remains | Reinforcing a layer that is already dominant |
These are starting points, not fixed zones. A good arrangement can reverse them. What matters is that each layer has enough musical space to remain clear.
Register is only the starting point
Register is the easiest kind of separation to hear, but it is not the only kind. Two parts can sit in the same register and still stay clear if one is short and percussive while the other is sustained. Two parts can sit in different registers and still turn to mud if both are dense, sustained, and heavily effected. Clear loops separate their layers through rhythm, articulation, note length, and density, not register alone.
The chord lesson
The chord layer causes the most congestion, because players reach for the full voicings they use when playing solo. A loop chord part often needs less guitar than a solo chord part. Once the bass is covering the low end and the riff is carrying the top, the chord layer only has to fill the middle. Three notes in the right place can work better than six.
The Extra lesson
The Extra layer is the flexible one, and it has the easiest trap. With the loop already going and the pedal ready for another overdub, it is tempting to add something just because there is room. Resist that. The Extra layer should answer one question: what is missing? A harmony line, a countermelody, a harmonic, a texture, an accent, an ambient wash, a contrasting rhythm. If nothing is missing, the best Extra layer is no Extra layer.
The Riff layer may be a riff, hook, melody, or other recognizable line. The name stays Riff for consistency across the Kalymi Loop Method, but the job is simply to carry the part a listener would recognize.
Register Map: where each layer sits, and how they overlap
These are starting points, not fixed zones. A good arrangement can reverse them. What matters is that each layer has enough musical space to remain clear.
Harmony
Circular Harmony: why some progressions loop
A loop repeats forever, so its harmony has to close a circle. The last moment of the loop has to connect back to the first moment as if the two were always meant to touch. Some progressions do this naturally. Others sound fine once through, then land with a bump every time the loop comes around. The difference is not luck. It is the mechanism you use to get from the end back to the beginning.
A chord progression loops cleanly when its final musical event leads the ear convincingly back to its beginning. There are several ways to make that connection, and they give the loop different characters, from settled and grounded to open and continuous.
The mechanisms
Here are five useful ways to connect the end of a progression back to its beginning.
The progression ends on the tonic, the home chord, and simply begins again. The most stable option. It works, but it can feel like starting over rather than continuing. Best when the first chord has enough momentum to relaunch the loop on its own.
The progression ends on the dominant, the chord that most wants to resolve home. The unresolved pull carries you back to the first chord, and the resolution happens across the seam instead of before it. Often the smoothest way to loop, because the music is still leaning forward at the moment it repeats.
A dedicated final measure or two whose only job is to send the music back to the top. The blues turnaround is the classic case. A small piece of writing you add specifically so the loop has a clean way home.
A short repeating harmonic cell, often two or four chords, designed not to fully resolve. Because it never settles, it never has a wrong place to repeat. Much modern and modal looping lives here.
Progressions that lean less on the strong pull of dominant to tonic and more on the colour of a mode. They loop because there is no strong resolution demanding to be heard, so the seam passes without drawing attention.
How the books use these
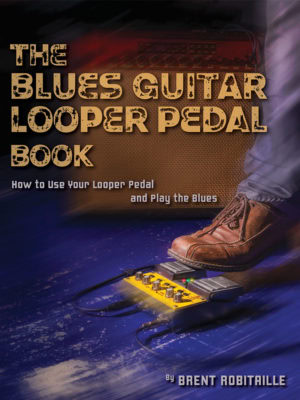
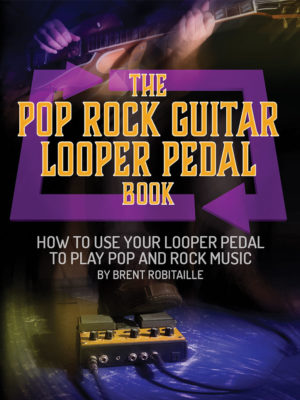
The three looper books put these mechanisms to work across a range of styles. The Blues, Jazz, and Pop Rock Guitar Looper Pedal Books each build loops that circle back cleanly, so every arrangement is ready to repeat the moment you close it.
Circular harmony makes the loop want to repeat. Timing is what lets it actually repeat cleanly. Even a perfectly circular progression sounds wrong if you close the loop in the wrong place. That is the last piece, and you can practice it right now.
Timing · Live Tool
The Seam Trainer
Closing the loop cleanly is a looper timing skill. Use the Seam Trainer to practice the exact moment where the end of one pass becomes the beginning of the next.
More on timing: Guitar Looper Pedal Timing Tips and 3 Classic Songs .
Practice the loop boundary
The hardest part of looping is closing the loop exactly where the next pass begins. Listen to two bars of count-in, then tap on beat 1 of bar 3. The trainer tells you how close your seam was.
Browser timing note: scores are approximate and can vary slightly with your device, browser and audio output.
This trainer needs a modern browser with sound. If nothing happens when you press Start, your browser may block audio until you interact with the page. Tap Start again.
Advanced
Take it further: Quartal to Four
The Easy Minor Blues loop keeps every layer simple so the method is easy to hear. The same five layers scale up. Quartal to Four is a more advanced loop in G Dorian, built from quartal chords and arpeggios, with richer harmony (Gm11, Am11, B♭maj7♭5) and parts that interlock more tightly. Same Riff, Bass, Chord, Rhythm, and Extra roles, more happening inside each one. Build it the same way and listen for how much more is going on in the same five-layer frame.
The printed Parts Page uses slightly different labels. Riff One fills the Riff role, Harmony fills the Extra role as a second melodic or harmony line, and Chords, Bass, and Rhythm correspond directly to the remaining Kalymi Loop Method layers. The musical labels can change to suit the arrangement; the underlying functions stay consistent.

Build the Loop: Quartal to Four
A more advanced loop in G Dorian, built from quartal chords and arpeggios. Same five layers, more happening inside each one. Tap a layer to add it, tap again to drop it out.
Nothing about the method changed. The layers did the same jobs. That is the point of a system: once you know the five roles, the three questions, and the way harmony closes a circle, you can arrange a loop of any difficulty without starting from scratch.
The Looper Listening Room
A few finished loops from the Kalymi looper books, played in full. Tap a track to listen. Some use all five layers, some use fewer. A good loop can be any number of parts. The five layers are a way to think about what each part does, not a rule that every loop must have exactly five.
Full arrangements and tab for these loops are in the Looper Guitar books. Tracks load only when you tap play, so the page stays fast.
Practice
Play over a groove
Building loops is easier over a steady beat. These four grooves cover the styles in the looper books. Each loops seamlessly for as long as you play, so you can settle in and work on your parts.
Drum Practice Loops
Four steady grooves to build your loops over. Each one loops seamlessly for as long as you play. Tap to start, tap again to stop. Download any of them to practice offline, or get all four in one download.
Gear
Choosing a looper
You do not need an expensive looper to use the Kalymi Loop Method. You need one that records cleanly, loops in time, and lets you build the layers you have planned. Loopers fall into a few broad types, and the right one depends on how many layers you want and how you like to work.
Single-switch loopers
One footswitch handles record, play, and overdub. Small, affordable, and the simplest way in. Ideal for learning the method and for players who build one loop and play over it. The limit is control: stopping, undoing, or switching parts cleanly takes practice on a single switch.
Dual-switch loopers
A second footswitch adds dedicated control, usually stop and undo, sometimes a second track. This is the sweet spot for most looping guitarists, because the method's layer work benefits from being able to undo a bad overdub without killing the whole loop.
Multi-track loopers
Separate tracks you can start, stop, and mute independently. This is where the Loop Chart earns its keep, because you can actually mute the Rhythm layer for a breakdown and bring it back on cue. More power, more to manage.
Tabletop and performance loopers
Larger units built for extended live sets, with multiple tracks, onboard effects, and storage. More than most players need to start, but the ceiling is high.
For a full buyer's walk-through, see Top 10 Tips to Buy the Best Guitar Looper Pedal.
History
An accurate history of the looper
Looping did not begin with a pedal. The idea of playing against a recording of yourself is almost as old as recording itself, and the pedal on your board is the latest step in a long line of invention. Here is how it actually happened.
The tape era: Les Paul
The modern story starts with Les Paul's experiments in overdubbing. In 1947 he recorded "Lover" by transferring performances between disc-cutting lathes, stacking guitar parts one generation at a time, and Capitol released it in 1948. His later work with magnetic tape pushed sound-on-sound and multitrack recording much further. He was not looping live, but he established the core idea the whole art rests on, one player building a full arrangement in layers.
The experimental era: Terry Riley and Frippertronics
In the 1960s, composers including Terry Riley built tape-delay systems that fed a signal from one reel machine to another and back, so recorded sound kept circulating while new sound was added. Riley called his the Time Lag Accumulator. Brian Eno used a similar two-machine setup on his 1975 album Discreet Music. When Robert Fripp adopted and popularized the technique, it picked up the name Frippertronics, coined around 1977. This was live looping in spirit, built from tape rather than digital memory.
Early dedicated digital hardware: the Paradis LOOP Delay
A pioneering purpose-built digital live looper arrived with the Paradis LOOP Delay, created by Matthias Grob. Grob's first prototype shipped in August 1992, and around 100 units sold over the following year. For the first time a musician could record and instantly repeat a precise, rhythmic loop on demand. It was later refined into the Oberheim Echoplex Digital Pro, which became a sophisticated standard for years. Because these early units had volatile memory, players had to build every loop fresh in front of the audience, which is part of how live looping as a performance art took shape.
The loop machines arrive
Other dedicated loopers followed. The Lexicon JamMan arrived in 1993, and the Boomerang Phrase Sampler reached players in the mid-1990s, each offering the instant record-and-repeat that made looping practical on stage. A community formed around the technique when Kim Flint founded the Loopers-Delight site and mailing list in 1996.
The pedal era: Boss puts looping on the floor
Looping reached ordinary players when Boss released the RC-20 Loop Station in 2001, a floor pedal that made record, overdub, and playback simple and affordable. The RC line grew into a broad family of looper pedals and performance units, and other brands followed, moving looping from specialist rigs onto everyday pedalboards.
The modern era: simplicity and stardom
Two things pushed looping into the mainstream. First, the tools got simple: the TC Electronic Ditto, introduced in 2013, stripped looping down to a single knob and a single switch, putting it within reach of any guitarist. Second, looping got famous. KT Tunstall's 2004 performance of "Black Horse and the Cherry Tree" on Later with Jools Holland, built live from a loop pedal, showed a television audience what one player and a looper could do. Ed Sheeran later built stadium shows on the same idea. What Les Paul did alone in a studio, a beginner can now do on stage with a pedal that costs less than a night out.
FAQ
Common looper questions
What is a looper pedal?
A looper pedal records a short phrase you play and instantly plays it back on repeat, so you can add more parts on top and build a full arrangement by yourself, live. Record, playback, overdub is the core of it.
Do I need to read music to use the Kalymi Loop Method?
No. The method is a way of thinking about loops as five layers, each with a job. The books use standard notation and tab, but you can apply the five-layer idea by ear. Reading helps, but it is not required to start.
What order should I record my layers in?
Whatever order lets each part lock to the one before it. Many players start with the layer that sets the time and harmony, often Bass or Chord, then add Riff and Rhythm, with Extra last. The Kalymi Loop Method notates the record order for each loop so you always know the plan before you start.
Why does my loop sound off every time it repeats?
Almost always one of two things: the progression does not close its circle, so the harmony feels finished before it repeats, or you are not closing the loop exactly on the beat, so the seam lands early or late. The Circular Harmony and Timing sections on this page address both, and the Seam Trainer lets you practice the timing directly.
What is the best looper for a beginner?
A simple single-switch or dual-switch looper is plenty to learn the method. Look for clean recording and easy, reliable control rather than the most tracks or features. Memory is rarely the limiting factor on modern units.
Can I loop on an acoustic guitar?
Yes. Looping works on acoustic and electric alike. An acoustic player can build percussion, bass, chords, and melody the same way. The method applies identically.
What is the Kalymi Loop Method?
The Kalymi Loop Method is a system for arranging guitar loops as separate musical layers rather than treating looping as a sequence of pedal operations. The five layers are Riff, Bass, Chord, Rhythm, and Extra, and the method uses a Parts Page to show what each layer plays and a Loop Chart to show when each layer enters, repeats, mutes, or returns.
How long should a loop be?
Long enough to state the idea and short enough to stay interesting on repeat. Many loops are two, four, or eight bars. A shorter loop repeats more often, so it needs to be more open; a longer loop holds more variety but takes longer to build live.
The Books
The Kalymi Looper Books
Every idea on this page is worked out in full in the looper books, with complete arrangements written as Parts Pages you can play straight through. Each book takes the Kalymi Loop Method into one style.
Looper Guitar eBook Bundle
Get all three Kalymi looper books: Blues, Jazz, and Pop Rock. Hundreds of riffs, progressions, layered studies, and complete loop arrangements in one bundle.
Or explore the books individually

Free Download
Get the complete Looper Starter Pack

Get the core free resources in one download: the Method Legend, both Parts Pages, a blank Loop Chart, the Checklist, and the drum grooves in loop and extended formats.

Continue learning: Looper Guitar Learning Path · Guitar Learning Path · Guitar Dictionary · Kalymi Music Library